NSX-T L3 VPN – VXLAN BGP EVPN Type 5

It’s been a long time since I worked at a service provider, where MPLS L3 VPNs were used to transport isolated customer networks. The way I remember it operating back then was by using multiple MP-BGP sessions between PE routers to share VPNv4 routes for different customers. This provides tenant isolation, however the number of sessions (and usually operational effort) grows as the number of customers grow. Also, each time a new PoP with a PE router is brought up, the number of places to maintain this ever growing amount of config increases.

A modern solution to this config and session sprawl seems to be VXLAN BGP EVPN. EVPN is probably most commonly known for it’s Type 2 (MAC/IP Advertisement) routes, enabling stretching an L2 domain (MAC addresses) over an L3 fabric. However EVPN itself is just a BGP address family, a control plane, used to share TEP information to facilitate host reachability. And in the case of NSX, VXLAN BGP EVPN can be used to share reachability to IP hosts (VMs) using Type 5 (IP Prefix) routes with the physical network. This provides a way to maintain tenant isolation without having to add a new BGP session for every customer and a potentially offers simplier set of configurations all round.

The topology that will be built up in this post:

NSX Configuration

NOTE: This already assumes NSX-T is deployed and BGP is up between the physical network and the T0.

First, create a VNI Pool. Each VNI in the pool will be used as a transit VXLAN VNI for each VRF that will be created:

Under the T0 EPVN Settings, set the EVPN Mode to Inline. This uses the Edge Transport Nodes in both the EVPN control plane and the VXLAN data plane. The alternative (Route Server) mode still uses the Edge Nodes in the control plane, but uses the Host Transport Nodes directly in the data plane, with additional config overhead not covered here. Also select the VNI Pool previously created:

Then create an EVPN TEP for each Edge Node. Note these will be used in the VXLAN data plane, so should be reachable in the physical fabric and will be advertised out in the next step. GENEVE will still be used for nomal East-West NSX data plane traffic, but these new TEPs will run VXLAN for the North-South traffic.

Under the BGP Route Re-Distribution menu, select EVPN TEP IP to advertise the VTEPs:

The Edge TEPs are now being advertised into the physical network and the physical TEPs should be reachable from the Edges. This could be achieved with static routes on the Edges, via an IGP like OSPF or by redistributing them into the IPv4 eBGP domain as seen here:

Now to enable the MP-BGP EVPN address family for the T0 BGP neighbours (the IPs of your TOR switches):

Usually in an NSX-T deployment the uplink VLANs from the Edges to the physical network can remain at 1500 bytes. This is because they’re not used for carrying Overlay (GENEVE) traffic. However, as they’ll now be using VXLAN they’ll need to be upped to 1600.

Next, create each VRF and link them to the underlying T0. The RD can be auto generated (based on the T0 RD) but may be easier to identify if set manually. Each VRF should use a unique VNI from the pool previously created. This VNI should match that being used on the physical network. Here RED is using VNI1338001 with auto RD and BLUE is 1338002 with a manual RD:

As part of the VRF, set a Route Target import and export policy to ensure routes for the VRF, both NSX Segments and external physical networks, are included in the MP-BGP EVPN address-family:

Apply route re-distribution to each VRF like you would with a normal T0 e.g. advertising all T0 and T1 subnets:

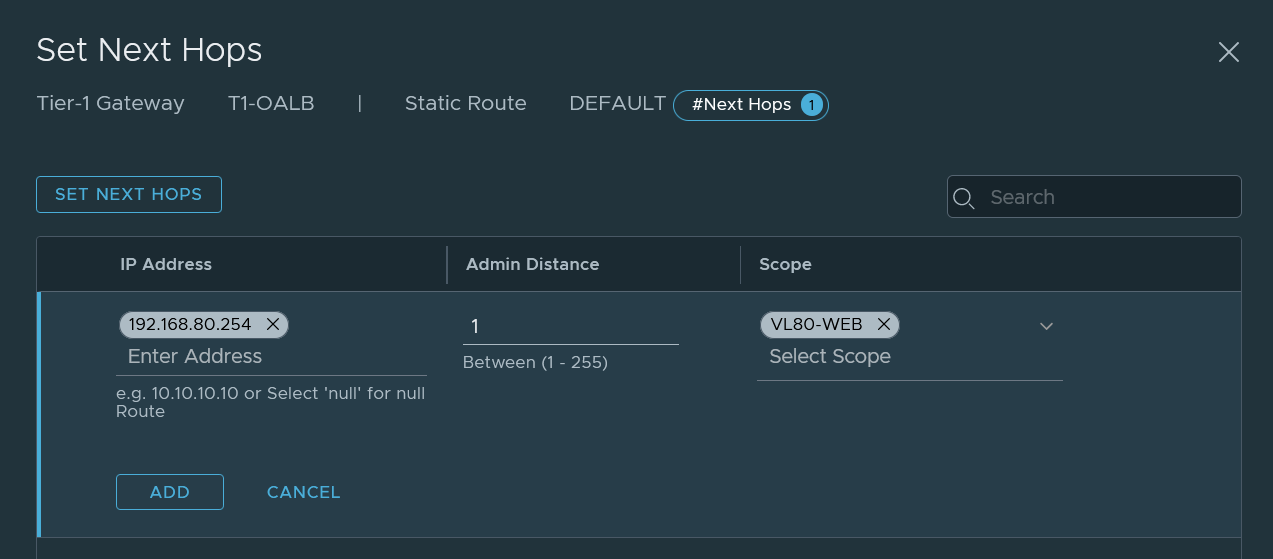
Create a T1 Gateway for each VRF, link them to their respective T0 VRF and again advertise routes as required:

Create a Segment for each of the VRFs and attach to their respective T1 Gateways, note that these subnets could now overlap as they are separate VRFs:

We can now see the Segments advertised into the physical network as EVPN Type 5 routes. Note here the BLUE-WEB Segment with the manual RD is listed and the next-hops are the VXLAN TEP IPs of the NSX Edge Nodes:

EVPN Routes on TOR2

And each is installed into its respective VRF table :

RED Routing Table on PE-RTR

BLUE Routing Table on TOR1

You can also view the RED and BLUE routing tables on the NSX Edges to see the externally learned routes that are also VRF-specific, extedning that multi-tenancy separation:

RED Routing Table on E01

BLUE Routing Table on E01

Attach a VM to one of the Segments and test ping from the VRF in the physical world:

Running a capture from the PE router, while pinging from the RED VM to the PE router shows the ICMP is inside a VXLAN packet, with the RED VNI of 1338001:

Note there is inherently no connectivity between VRFs. To enable comms between the two you could implement traditional route leaking on the physical network, or use static routes on the T0 router to prevent traffic even leaving the NSX domain.

One-Arm VLAN-Backed Load Balancer in NSX-T

There are two main deployment methods for Load Balancers in NSX-T, both offer the same features so the differences are just in connectivity:

  • Inline/Transparent – The load balancer sits in the middle of the network between the clients and servers, so one interface receives the client traffic, another forwards to the servers .The source IP remains the client’s original IP, so the back end servers must have a route back, which should go via the load balancer. See the implementation here
  • One-Arm – Uses the same interface to receive the client traffic as it does to reach the back end servers. This method requires the use of SNAT to modify the client IP to that of the load balancer. The back end servers only need to know how to get back to the load balancer, not the original clients.

Using a VLAN-backed Segment will allow the load balancer to direct traffic to both VM and bare metal workloads that may live on the same broadcast domain.

There are two supported connectivity methods for the ‘arm’ in the One Arm Load Balancer in NSX-T. One uses a T1 Uplink Interface to connect to a T0, but unlike Inline, uses the same interface to reach the back end servers. The other, which is the focus of this post, uses a T1 Service Interface to provide connectivity:

Setup the Network

First create a VLAN Segment, which will be used to connect VMs to be load balanced. It should be connected to a Transport Zone that is applied to the hosts that will run the VMs and also the Edge Custer that will be used to host the T1 Gateway that will be created next:

Then create a new T1 Gateway. It should be assigned to an Edge Cluster in order to run the centralised load balancer service, but doesn’t need to be connected to a T0:

Then create a Service Interface on the T1 that connects to the VLAN Segment created at the start:

Then create a static route on the T1 to reach the external networks. The next hop could be another T1 (that connects to a T0) or the physical network, depending on your setup:

Configure the Load Balancer

Create a Load Balancer in Load Balancing > Load Balancers > Add Load Balancer and attach it to the T1 Gateway:

Create a Server Pool to specify which back-end servers are to be load balanced. Note that the SNAT Translation Mode is set to Automap, which means the Source IP will be that of the T1 rather than the original client IP. :

The Members/Group contains the criteria to match the back-end servers, this could be using Tags, VM Names, or for non-NSX-aware workloads such as bare metal IP addresses:

This is also wher eyou can set a back end port, if this is different to your front end. E.g. if the app runs on port 8000, but we want the clients to go to 80, set 8000 for the members and set 80 later in the Virtual Server:

Then create a Virtual Server, which acts as the entry point to the Load Balancer, setting the virtual IP/port/protocol. It needs to reference the Pool that’s just been created and is attached to the Load Balancer:

At this point the topology from NSX looks like this:

Checking the Traffic

Now the Load Balancer should be switching between the two pool members, using the Round Robin method:

Checking the statistics shows traffic going to both the VM workloads and the bare metal, which was specified by IP:

Checking the web server logs shows that the client source address is the T1 Service Interface address:

The return traffic then goes via the T1 before returning to the client.

Geneve Inside Geneve

Disclaimer: This is by no means an optimal solution and is only being deployed to see Geneve in action!

Just like VXLAN before it, Geneve is the current flavour of overlay network encapsulation helping to improve networking in the virtual world, without worrying about the physical routers and switches that now sit in the boring underlay. It is probably best known for its use in VMware’s NSX-T, however it isn’t some secret proprietary protocol. It was in fact created by VMware and Intel, among others as a proposed RFC standard, so anyone can implement it.

Another product that makes use of Geneve to create overlay networks is Cilium, an eBPF-based Kubernetes CNI. It uses Geneve tunnels between K8s nodes to enable pod reachability, this includes both inter-pod networking and connectivity from Services to pods.

So what better way to see Geneve in action than to run Cilium inside NSX-T, running Geneve inside Geneve. In practice this means running K8s on VMs, with Cilium as the CNI, that are connected to NSX-T Segments.

App Topology

Here’s an overview of the micro-services app that’s being used:

Clients connect to the UI pods to view the web front-end, which in the background talks to the API pods to retrieve data from the database. The traffic from the UI to the API will need to go through two Geneve tunnels, as they will be hosted on different L3-separated hosts.

Ensuring the use of Overlay

First of all, Geneve is only used to tunnel traffic between hosts/nodes. So to make sure it’s used we need to ensure the VMs and pods are placed on different hosts and nodes respectively. This can be achieved by disabling DRS or creating anti-affinity rules in vCenter and by using Node Selectors in K8s.

Here’s the physical view of the app components in the infrastructure:

  • GENEVE-H01 & H02 are ESXi hosts
  • GENVE-UK8N1 and N2 are Ubuntu VM K8s nodes
  • GENEVE-K8S is an NSX-T Overlay Segment
  • Each K8s node has it’s own Cilium pod network
  • LoadBalancer type Services are provided by MetalLb in L2 mode

Kubectl confirms this diagram by showing which pod lives on which node:

And the Cilium Geneve tunnels can be listed by issuing a simple command in each of the pods:

So traffic from the UI pods need to go to another node, via another host to reach the API pods. Whereas all the underlay network needs to know is how to get from the TEP of Host1 to the TEP of Host2.

Seeing Geneve²

Traffic is generated from a client browsing the UI, which talks to the API, which can then be captured from Host1 in the outbound direction (after NSX-T Geneve encapsulation):

nsxcli -c start capture interface vmnic3 direction output file geneve.pcap
  • The outermost conversation is a Geneve flow from Host1 TEP to Host2 TEP (NSX-T)
  • Then next Geneve flow is from Node1 TEP to Node2 TEP (Cilium)
  • And finally the actual application HTTP traffic from the UI Pod to the API Pod

In the real world the workload placement would probably mean no traffic would even need to go on to the wire, but it’s always good to see what would happen when it does!

Configuring OSPF in NSX-T

The release of NSX-T 3.1.1 brings with it, among other things, OSPFv2 routing! This may be a welcome return to many enterpirses who haven’t adopted BGP in the datacentre and allows for a smoother transition from NSX-V, which has always had OSPF support.

Unlike with NSX-V, where routing was used within the virtual domain (between ESGs and DLRs), NSX-T only uses dynamic routing protocols for external P-V connectivity. So OSPF is enabled on T0 Gateways, connecting to the physical world.

Once you have a T0 Gateway deployed, enabling OSPF is now just a few clicks away…

Here’s the logical topology that will be configured in the rest of this post:

Configuring OSPF

1. Assign each interface for each VLAN to the relevant Edge Node:

2. Disable the BGP toggle and enable the OSPF toggle:

3. Create an Area definition (only a single Area can be created). The type can be either Normal or NSSA and the authentication method can be one of the usual for OSPF; Type 0 (None), Type 1 (Plaintext) or Type 2 (MD5):

4. Configure each interface to be used in the OSPF process. Each interface and area can be handily selected from the dropdown, then set the Enabled toggle. Interfaces can be of type broadcast (DR/BDR) or P2P:

5. To advertise out overlay segments to the physical world, create a route redistribution policy, selecting the types of routes to advertise e.g. T1 connected and select OSPF as the Destination Protocol:

6. Then don’t forgot to enable the newly created OSPF route redistribution:

As long as the physical network has also been setup there should now be a few neighbours forming, which can be viewed directly in the NSX UI:

A neighbourship will form between the two T0 SR instances, but will be in the 2Way/DROther state, as DR and BDR are in use, all others are to the physical net

And a similar view from the physical world:

Finally, here’s some routes of Segments that are connected to a T1, “advertised” to the T0, then redistributed out to the physical network using ECMP OSPF from the T0 SRs:

Firepyer – Automating Cisco FTD in FDM mode with Python

FTD FDM WTF?

I recently started looking into options for automating the deployment and configuration of Cisco’s FTD (Firepower Threat Defense) devices… This is Cisco’s latest attempt at a NGFW, bringing together a unified platform containing the best bits from their long-standing ASA firewall and their Sourcefire IDP acquisition.

As of version 6.2.something, Cisco offers two methods of managing FTD devices. The first is using FMC (Firepower Management Center), a centralised management controller, which comes in either virtual or physical appliance format and can be used to manage a number of devices. The second option, which is the focus of this post is FDM (Firepower Device Manager) which is a local ‘on-box’ method of managing a standalone (or HA pair) appliance.

I won’t discuss the pros and cons of each, but currently there is no ability to migrate from one management option to the other, so choose wisely. If you find FDM fits your needs and you have a large number of devices to configure or just want some automation then read on…

Enter Firepyer

There’s plenty out there for automating devices configured to use FMC, but not much for standalone FDM devices. I found a few Ansible modules here and there and a bulk config tool, but these only cover a small portion of the FDM feature set, so I decided to create Firepyer.

Firepyer consumes the REST API that becomes available when you select FDM mode and provides some easy to use Python methods to interact with your NGFW and get/send structured data. Currently there’s only a hand full of operations that are implemented, but my aim is to get full CRUD (Create, Read, Update, Delete) support for the majority of popular features. The list of current features are shown in the Firepyer Docs.

Using Firepyer

If you’re familiar with Python then the docs should be enough to get you started using Firepyer, but if you’re pretty new then here’s how to get going (some commands may be different depending on your platform)…

1. It’s always good to use a virtual environment to separate dependencies between projects and system-level packages:

python -m venv venv

2. Then enter your new venv…

in Linux:

source ./venv/bin/activate

or in Windows:

.\venv\Scripts\activate

3. As Firepyer is available on PyPI (the Python Package Index) you can then easily install it into your venv:

pip install firepyer

4. Now start an interactive Python shell, import the Fdm class, create an object with your FTD details and start automating:

(venv) C:\Users\username> python
>>> from firepyer import Fdm
>>> fdm = Fdm(host='192.168.133.7', username='admin', password='Admin123')
>>> print(fdm.get_vrfs())

[{'description': "Customer A's VRF",
  'id': '67e4d858-503d-11eb-aab5-2921a41f8ca3',
  'interfaces': [{'hardwareName': 'GigabitEthernet0/2',
                  'id': 'aeb5b238-4d44-11eb-9e04-cd44159d2943',
                  'name': 'customer_a',
                  'type': 'physicalinterface',
                  'version': 'nh7piq3rw7pzs'}],
  'isSystemDefined': False,
  'links': {'self': 'https://192.168.133.7/api/fdm/latest/devices/default/routing/virtualrouters/67e4d858-503d-11eb-aab5-2921a41f8ca3'},
  'name': 'Customer-A',
  'type': 'virtualrouter',
  'version': 'crdwtc44cg5pu'},
 {'description': "Customer B's VRF",
  'id': '7360254c-503d-11eb-aab5-41ec0935f001',
  'interfaces': [{'hardwareName': 'GigabitEthernet0/3',
                  'id': 'afb288c9-4d44-11eb-9e04-41c0f86d8474',
                  'name': 'customer_b',
                  'type': 'physicalinterface',
                  'version': 'ocdhtp76zpfzz'}],
  'isSystemDefined': False,
  'links': {'self': 'https://192.168.133.7/api/fdm/latest/devices/default/routing/virtualrouters/7360254c-503d-11eb-aab5-41ec0935f001'},
  'name': 'Customer-B',
  'type': 'virtualrouter',
  'version': 'nl7onsmfqdujm'},
 {'description': 'This is a Global Virtual Router',
  'id': '42e95fbf-fd5a-42bf-a95f-bffd5a42bfd6',
  'interfaces': [{'hardwareName': 'Management0/0',
                  'id': 'b0b5a0ea-4d44-11eb-9e04-43089048338b',
                  'name': 'diagnostic',
                  'type': 'physicalinterface',
                  'version': 'inmqiea7woymm'},
                 {'hardwareName': 'GigabitEthernet0/1',
                  'id': 'ad6a9497-4d44-11eb-9e04-63d0b1958967',
                  'name': 'inside',
                  'type': 'physicalinterface',
                  'version': 'eqotynhtlcuyf'},
                 {'hardwareName': 'GigabitEthernet0/0',
                  'id': '8d6c41df-3e5f-465b-8e5a-d336b282f93f',
                  'name': 'outside',
                  'type': 'physicalinterface',
                  'version': 'h4kqp4iu2yvff'}],
  'isSystemDefined': True,
  'links': {'self': 'https://192.168.133.7/api/fdm/latest/devices/default/routing/virtualrouters/42e95fbf-fd5a-42bf-a95f-bffd5a42bfd6'},
  'name': 'Global',
  'type': 'virtualrouter',
  'version': 'cna3vbajed6et'}]

5. View the docs to see everything else you can do!

Disclaimer: Firepyer is still in early development so I take no responsibility if your network goes up in flames!

vSphere with Kubernetes: Working with Embedded Harbor

When you’ve enabled Workload Management on your Supervisor Cluster you’ll want to start spinning up some containers! You can of course use a public container registry like Docker Hub, but vSphere w/ K8s provides a convenient one-click private registry called Embedded Harbor, to use your private images.

Harbor was included in VMware’s first container platform, VIC, so it’s good to see its development continue here. As this is an embedded version it doesn’t have all the features of a standalone deployment, but is enough to do the basics.

Enabling Harbor

Enabling the registry is one of the smoothest parts of vSphere w/ K8s. Simply got to the Supervisor Cluster > Configure > Image Registry and click Enable Harbor that’s it!

After a few minutes you’ll your first Pods being deployed to a new ‘vmware-system-registry’ Namespace:

And the Health of the Image Registry should change to Running. There will also be a link to the Harbor UI, which will be an IP in your Ingress range used to setup K8s. Another important link here is the Root certificate, which you should download now.

Using The Harbor Registry

As the Harbor registry is nicely integrated into vCenter, every time you create a new Namespace a new project is created in Harbor. Also, logging into Harbor is controlled with vSphere SSO. Here I’ve created a Namespace in the vSphere Client called ‘netwatch’, logged into Harbor from the link in the Image Regisrtry and the project has been automatically  created:

To get images into the registry you can use Docker. As Harbor is using a self-signed cert you’ll get an error if you try to login straight away. There’s 2 options here:

  1. The secure method is to install the Harbor root certificate into your local machine you’ll be using Docker from. The install location may depend on your OS, but on Ubuntu it’s in /etc/docker/certs.d/. The cert can obtained from the Image Registry page in vCenter or within a Harbor Project:
  2. Alternatively and purely for testing purposes you can modify your docker daemon.json file to allow an insecure registry, then restart docker:

Pushing Your Images

Now to get your images into the registry! Login to Harbor with docker:

docker login YOUR.HARBOR.IP.ADDRESS
Username: administrator@vsphere.local
Password:
Login Succeeded
Then tag and push your images with the following format:
docker tag PROJECT/IMAGE:TAG YOUR.HARBOR.IP.ADDRESS/PROJECT/IMAGE:TAG
docker push YOUR.HARBOR.IP.ADDRESS/PROJECT/IMAGE:TAG
The image will then be in your Harbor repo:

Using Your Images

To consume your new private images in Pods you’ll need to provide the full path to the image in your YAML or a quick and dirty deployment example:

kubectl create deployment quickdeploy --image=YOUR.HARBOR.IP.ADDRESS/netwatch/netwatch-api:1.0

And here’s the quickdeploy Pod along with a few others up and running:

NSX-T Policy API Single JSON PATCH

The NSX-T Policy API is a powerful concept that was introduced in 2.4 and powers the new Simplified UI. It provides a declarative method of describing, implementing and deleting your entire virtual network and security estate.

In a single API call you deploy a complete logical topology utilising all the features NSX-T provides including T1 Gateways (with NAT/Load Balancer services) for distributed routing, Segments for streched broadcast domains and DFW rules to enforce microsegmentation.

This example performs the following:

  • Creates a T1 Gateway and connects it to the existing T0
  • Creates three Segments and attaches them to the new T1
  • Creates intra-app distributed firewall rules to only allow the necessary communication between tiers
  • Creates Gateway Firewall rules to allow external access directly to the web tier
  • Creates a Load Balancer for the web tier with TLS-offloading using a valid certificate

And once deployed the topology will look like this:

Currently, on the networking side there is only a T0 Gateway, a single Segment (which is a VLAN-backed transit Segment to the physical network), with no T1s or Load Balancers:

And on the security side there’s no DFW policies :

Once the JSON body (see my example here) is created with the relevant T0, Edge Cluster and Transport Zone IDs inserted, then the REST call can be constructed. Using your favourite REST API client e.g. Curl, Postman, Requests (Python), the request should look like this:

URL: https://NSX-T_MANAGER/policy/api/v1/infra/
Method: PATCH
Header: Content-Type: application/json
Auth: Basic (NSX-T Admin User/Password)
Body: The provided JSON

Once you send a successful request you’ll notice you receive a status 200 almost instantly, but don’t be fooled into thinking that your entire topology has now been created!

In reality this is just the policy engine acknowledging your declarative intent. It now works to convert or ‘realise’ that intent in to imperative tasks that are used to create all of the required logical objects.

Once this has all been created you’ll see your network and security components in the GUI:

Now the magic of using this API means that you can also delete your entire topology with the same call, just changing the marked_for_delete to true for each section.

Example code here: https://github.com/certanet/nsx-t-policy-api

Configuring NSX-T 2.5 L2VPN Part 2 – Autonomous Edge Client

Continuing on from the server configuration in Part 1, this is the NSX-T L2VPN Client setup.

There’s a few options to terminate an L2VPN in NSX-T, but all of them are proprietary VMware, so there’s no vendor inter-op here. This article uses the ‘Autonomous Edge’ option, previously called Standalone Edge in NSX-V, which is essentially  a stripped-down Edge VM that can be deployed to a non-NSX prepped host. Confusingly this isn’t the new type of Edge Node used in NSX-T, but instead is the same ESG that was used in V.

The Topology

The Overlay Segments on the left are in the NSX site that’s hosting the L2VPN server. On the right is a single host in a non-NSX environment that will use the Autonomous Edge to connect the VLAN-backed Client-User VM to the same subnet as SEG-WEB.

OVF Deployment

First the Autonomous Edge OVF needs to be deployed in vCenter:

The first options are to set the Trunk and Public (and optionally HA) networks. The Trunk interface should connect to a (shock) trunked portgroup (VL4095 in vSphere) and the Public interface should connect to the network that will be L3 reachable by the L2VPN server (specifically the IPSec Local Endpoint IP). Also, as this is an L2VPN there will need to be a loosening of security settings to allow unknown (to vCenter) MACs to be allowed. If the portgroups are in a VDS then a sink port should be used for the Trunk, alternatively if on a standard portgroup; Forged Transmits and Promiscuous Mode are required.

Next, set up the passwords and Public interface network settings. Then in the L2T section set the Peer Address to the L2VPN Local Endpoint IP and copy the Peer Code from the server setup into the Peer Code field:

The last step in the OVF is to set the sub-interface to map a VLAN (on the local host) to the Tunnel ID (that was set on the Segment in the server setup). Here VLAN80 will map to Tunnel ID80 which mapped to the SEG-WEB:

The Tunnel

Once the OVF is deployed and powered on, either the L2VPN Client or Server can initiate an IKE connection to the other to setup the IPSec tunnel. Once this is established then a GRE tunnel will be setup and the L2 traffic will be tunnelled inside ESP on the wire. There’s a few options to view the status of the VPN:

Client tunnel status:

Server tunnel status:

GUI tunnel stats:

Connecting a Remote VM

Now that the VPN is up a VM can be placed on VLAN 80 at the remote site and be part of the same broadcast domain as the SEG-WEB Overlay Segment. Here the NSXT25-L2VPN-Client-User VM is placed in a VLAN80 portgroup, which matches what was set in the OVF deployment. NOTE there isn’t even a physical uplink in the networking here (although this isn’t a requirement) so traffic is clearly going via the L2VPN Client:

Now set an IP on the new remote VM in the same subnet as the SEG-WEB:

And load up a website hosted on the Overlay and voila!

NSX-T 2.5 Inline Load Balancer

See here for configuring a One-Arm Load Balancer

Load balancing in NSX-T isn’t functionally much different to NSX-V and the terminology is all the same too. So just another new UI and API to tackle…

As load balancing is a stateful service, it will require an SR within an Edge Node to provide the centralised service. It’s ideal to keep the T0 gateway connecting to the physical infrastructure as an Active-Active ECMP path, so this LB will be deployed to a T1 router.

The Objective

The plan is to implement a load balancer to provide both highly available web and app tiers. TLS Offloading will also be used to save processing on the web servers and provide an easy single point of certificate management.

  1. User browses to NWATCH-WEB-VIP address
  2. The virtual server NWATCH-WWW-VIP is invoked and the request is load balanced to a NWATCH-WEB-POOL member
  3. The selected web server needs access to the app-layer servers, so references the IP of NWATCH-APP-VIP
  4. The NWATCH-APP-VIP virtual server forwards the request onto a pool member in NWATCH-APP-POOL
  5. The app server then contacts the PostgreSQL instance on the NWATCH-DB01 server and the user has a working app!

Configuration

First the WEB and APP servers are added to individual groups, that can be referenced in a pool. Using a group with dynamic selection criteria allows for automated scaling of the pool by adding/removing VMs that match the criteria:

Each group is then used to specify the members in the relevant pool to balance traffic between:

A pool then needs to be attached to a Virtual Server, which defines the IP/Port of the service and also the SSL (TLS) configuration. Here a Virtual Server is created for each service (WEB and APP):

The final step is to ensure that the new LB IPs are advertised into the physical network. As the LB is attached to a T1 gateway it must first redistribute the routes to the T0, which is done with the All LB VIP Routes toggle:

Next is to advertise the LB addresses from the T0 into the physical network, which is done by checking LB VIP under T0 Route Re-distribution:

Here’s confirmation on the physical network that we can see the /32 VIP routes coming from two ECMP BGP paths (both T0 SRs), as well as the direct Overlay subnets:

Traffic Flow

There’s now a lot of two letter acronyms in the path now from the physical network to the back end servers, there’s T0, T1, DR, SR, LB, so what does the traffic flow actually look?

The first route into the NSX-T realm is via a T0 SR, so check how it knows about the VIPs: 

It can see the VIP addresses coming from a 100.64.x.x address, which in NSX-T is a subnet that’s automatically assigned to enable inter-tier routing. In this case the interface is connected from the T0 DR to the T1 SR:

So the next stop should be the T1 gateway. From the T1 SR the VIP addresses are present under the loopback interface:

So the traffic flow for this Inline Load Balancer looks like the below:

traffic-flow

The Final Product

Testing from a browser with a few refreshes confirms the (originally HTTP-delivered) WEB and APP servers are being round-robin balanced and TLS protected:

And the stats show a perfect 50/50 balance of all servers involved:

Configuring NSX-T 2.5 L2VPN Part 1 – Server

NSX-T 2.5 continues VMware’s approach to assist moving all stateful services to T1 gateways, meaning you can keep your T0 ECMP! This version brought the ability to deploy IPSec VPNs on a T1, however L2VPN still requires deployment to a T0. I’m sure it’ll be moved in a later version but for now here’s the install steps…

First, ensure your T0 gateway is configured as Acitve-Standby, which rules out ECMP, but allows stateful services. NOTE: this mode cannot be changed after deployment so make sure it’s a new T0:

To enable an L2VPN you must first enable an IPSec VPN service. Create both and attach  to your T0 gateway as below:

Next create a Local Endpoint, which attaches the the IPSec service just created and will terminate the VPN sessions. The IP for the LE must be different to the uplink address of the Edge Node it runs on, which is then advertised out over the uplink as a /32.

To ensure the LE address is advertised into the physical network enable IPSec Local IP redistribution in the T0 settings:

And here’s the route on the TOR:

Now it’s time to create the VPN session to enable the peer to connect. Select the Local Endpoint created above and enter the peer IP, PSK and tunnel IP:

You can then add segments to the session from here, or directly from the Segments menu:

OR

There’s one last thing to wrap up the server side config and that’s retrieving the peer code. Go to VPN > L2VPN Sessions > Select the session > Download Config, then copy the peer code from within the config, which will be used in the next part configuring the client…